Elevators are the backbone of modern buildings, whisking passengers and goods between floors with remarkable efficiency. Yet, like any complex machinery, elevators can develop faults that interrupt service, frustrate users, and even pose safety risks. As elevator parts suppliers, we’ve seen these issues countless times. In this guide, we’ll dive into six of the most common elevator problems, explain their technical roots, and outline professional solutions—empowering maintenance teams and building managers to keep elevators running smoothly.
1. Elevator Won’t Start
Symptom
The doors open and close normally, but when you select a floor, the car remains stationary.
Technical Causes
- Power Supply Interruption: A blown fuse, tripped breaker, or faulty transformer can cut power to the drive system.
- Control Circuit Fault: A failed contactor or relay in the motor starter prevents the drive from engaging.
- Safety Interlock Open: Door locks, pit switches, or safety edges that fail to confirm a closed/locked state will inhibit car movement.
Professional Solutions
- Electrical Audit: Using a multimeter, verify voltage at the main disconnect, drive input, and motor terminals. Replace fuses or reset breakers as needed.
- Inspect Control Contacts: Examine contactor coils and relay contacts for pitting or welding. Replace worn modules with OEMspecified parts.
- Test Safety Circuits: Simulate closed door lock and pitswitch conditions at the controller. Confirm that safety relays energize; replace faulty interlocks.
2. Excessive Running Noise
Symptom
Loud grinding, squealing, or metallic rattling during ascent or descent.
Technical Causes
- Insufficient Rail Lubrication: Dry or contaminated guide rails increase friction and noise.
- Worn Guide Shoe Rollers/Bearings: Flattened rollers or bearing failures produce scraping or thumping sounds.
- Drive Train Wear: Gear reducer backlash, loose coupling, or worn motor bearings can transmit noise through the hoistway.
Professional Solutions
- Rail Maintenance: Clean guide rail surfaces, apply manufacturerapproved lubricant sparingly, and wipe off excess.
- Roller & Bearing Replacement: Disassemble guide shoe units, inspect rollers with a dial indicator for runout, and fit new sealed bearings.
- Drive Inspection: Listen for unusual frequencies at the gearbox; check oil level/quality in the reducer. Replace seals or rebuild the gearbox if metal particles are present.
3. Inaccurate Floor Leveling
Symptom
The car stops noticeably above or below the landing threshold, creating a tripping hazard.
Technical Causes
- Faulty Position Feedback: Encoders or magnetic sensors misreport the car’s position to the controller.
- Control Parameter Drift: VFD acceleration/deceleration or leveling time settings have shifted due to power surges or firmware resets.
- Mechanical Backlash: Worn sheave grooves or slack in compensating ropes introduce positioning errors.
Professional Solutions
- Sensor Calibration: Replace suspect rotary encoders and verify pulse counts per revolution against nameplate data. For magnetic zone sensors, confirm proper pole spacing and signal amplitude.
- Drive ReTuning: Access the VFD’s maintenance menu; restore factory leveling parameters or adjust “trim down” values to finetune stop offset within ±5 mm tolerance.
- Mechanical Adjustments: Examine sheave grooves for wear; schedule rope change if groove wear exceeds half the rope diameter. Adjust compensating chain tension to manufacturer’s spec.
4. Doors Fail to Close
Symptom
Doors open as commanded but refuse to close automatically, requiring repeated button presses or manual force.
Technical Causes
- Actuator Signal Failure: A defective closedoor relay or dry solder joint interrupts the actuator command.
- Sensor Obstruction: Faulty infrared or lightcurtain sensors falsely detect an obstruction, holding doors open.
- Locking Mechanism Wear: Worn or misaligned locks prevent the door from latching, which the control logic treats as an unsafe condition.
Professional Solutions
- Control Board Diagnostics: Use onboard fault logs to identify “door close inhibited” error codes. Replace relays or reflow solder on control PCBs when needed.
- Sensor Alignment & Cleaning: Inspect photoelectric sensors for misalignment or film buildup. Clean lenses with alcohol wipes and ensure beam interruption tests pass.
- Lock Mechanism Overhaul: Check striker plates and lock pins for wear; realign or replace lock assemblies. Confirm the doorlocked microswitch closes at the correct stroke.
5. Frequent Breakdowns
Symptom
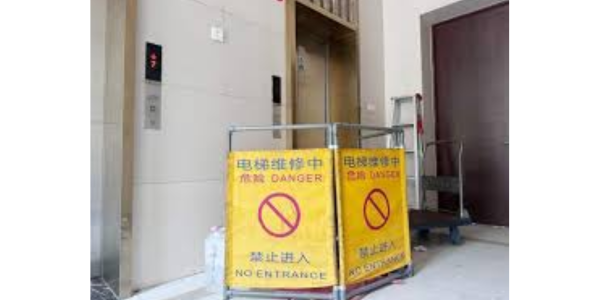
Recurring faults and service calls—often shortly after a repair.
Technical Causes
- Chronic Overload: Operating above rated load accelerates wear on motors, brakes, and cables.
- Aging Electrical Components: Capacitors, contactors, and circuit boards degrade over time, leading to intermittent failures.
- Poor Preventive Maintenance: Inadequate lubrication, delayed inspections, or skipped cleaning allow small issues to escalate.
Professional Solutions
- Load Analysis: Review passenger and freight usage patterns. If capacity is routinely exceeded, consider installing an additional car or upgrading traction components.
- Component Lifecycle Management: Develop a replacement schedule for timesensitive parts—such as electrolytic capacitors (≈10 years) and brake linings (≈5 years)—to preempt failure.
- Comprehensive Maintenance Program: Adhere to a regimented checklist covering lubrication, electrical tightening, safetycircuit testing, and visual inspections at monthly, quarterly, and annual intervals.
6. Erratic Speed or Stalling
Symptom
Sudden surges or drops in speed; occasional complete stops mid-travel.
Technical Causes
- VFD Malfunction: Inconsistent waveform output, overheating, or corrupted parameter sets can disrupt motor control.
- Motor or Reducer Wear: Winding insulation breakdown or gear tooth fatigue can cause torque fluctuations.
- Control Logic Glitches: Software bugs or memory errors introduce erratic acceleration or unexpected deceleration commands.
Professional Solutions
- Drive Testing: Connect to the VFD’s diagnostic port. Monitor voltage and current waveforms with an oscilloscope. Replace modules showing phase imbalance or fault counters.
- Mechanical Overhaul: Perform megger insulation tests on motor windings. If values drop below 1 MΩ, rewind or replace the motor. Inspect gear teeth and replace the reducer if micropittings found.
- Software Audit: Check for firmware updates from the controller manufacturer. Reinstall stable firmware versions and validate logic sequences in a simulation environment before field deployment.
Conclusion
Elevator reliability hinges on proactive maintenance, accurate fault diagnosis, and high-quality component replacement. By understanding these six common problems—from nostart conditions to erratic speed—and applying professional solutions, maintenance teams can minimize downtime, extend equipment life, and ensure passenger safety.
Keeping elevators reliable and safe means addressing issues quickly and using the right parts. For high-quality components and expert support, contact POTENSI today—we’re here to help you keep your elevators running smoothly.